How to Install a Smart Doorbell for Visitor Alerts

ByteChoice Team
Tech Experts

Boost home security with a smart doorbell like Ring or Nest Hello, delivering instant visitor alerts to your phone. This beginner-friendly guide walks non-technical users through installation and setup, ensuring peace of mind in 2025.
How to Install a Smart Doorbell for Visitor Alerts
Missed deliveries, unexpected visitors, or porch pirates got you stressed? A smart doorbell like Ring Video Doorbell or Nest Hello transforms your front door into a high-tech guardian, sending live video and alerts to your phone. No electrical expertise? No worries! This guide is crafted for non-techies, walking you through installation and setup in under an hour. With smart doorbells in 25% of U.S. homes (CNET, 2024), 2025 is the year to secure your space. Let’s get started!
Prerequisites
- Smart doorbell (e.g., Ring Video Doorbell, $100; Nest Doorbell, $180).
- Smartphone with the Ring app or Google Home app.
- Wi-Fi network name and password.
- Tools: screwdriver, optional drill, and ladder (if high mounting).
- Optional: Existing doorbell wiring (or choose a battery-powered model).
Step 1: Choose the Ideal Location
Pick a spot near your front door, about 4 feet high, with a clear view of visitors and your porch. Ensure it’s within Wi-Fi range (test with your phone’s signal). Avoid direct sunlight to prevent camera glare.
- Why It Matters: Proper placement maximizes video quality and alert accuracy.
- Pro Tip: Angle the doorbell slightly downward for better face capture.
Step 2: Power Off and Remove Old Doorbell (If Applicable)
If replacing an existing doorbell, turn off power at your circuit breaker for safety. Unscrew the old doorbell, disconnect the two wires (power and ground), and tape them to the wall to prevent slipping inside.
- Why It Matters: Safety first—avoid shocks during installation.
- Pro Tip: If no existing doorbell, opt for a battery-powered Ring or Nest (no wiring needed).
Step 3: Mount the Doorbell Bracket
Hold the doorbell’s mounting bracket against the wall, aligning with your chosen spot. Mark screw holes with a pencil. For drywall or wood, screw directly; for brick, drill pilot holes with a masonry bit (included in most kits). Secure the bracket with provided screws.
- Why It Matters: A sturdy mount ensures long-term reliability.
- Real-World Win: Lisa, a renter, installed a Ring on her apartment door in 20 minutes, no drill needed.
Step 4: Connect the Wires (Wired Models Only)
For wired doorbells, attach the two exposed wires to the doorbell’s terminals (check the manual for labels, typically “Front” and “Trans”). Tighten screws to secure. For battery models, skip this and charge the battery fully (4–6 hours).
- Why It Matters: Correct wiring powers the doorbell without interruptions.
- Pro Tip: Use included wire extenders if your wires are too short.
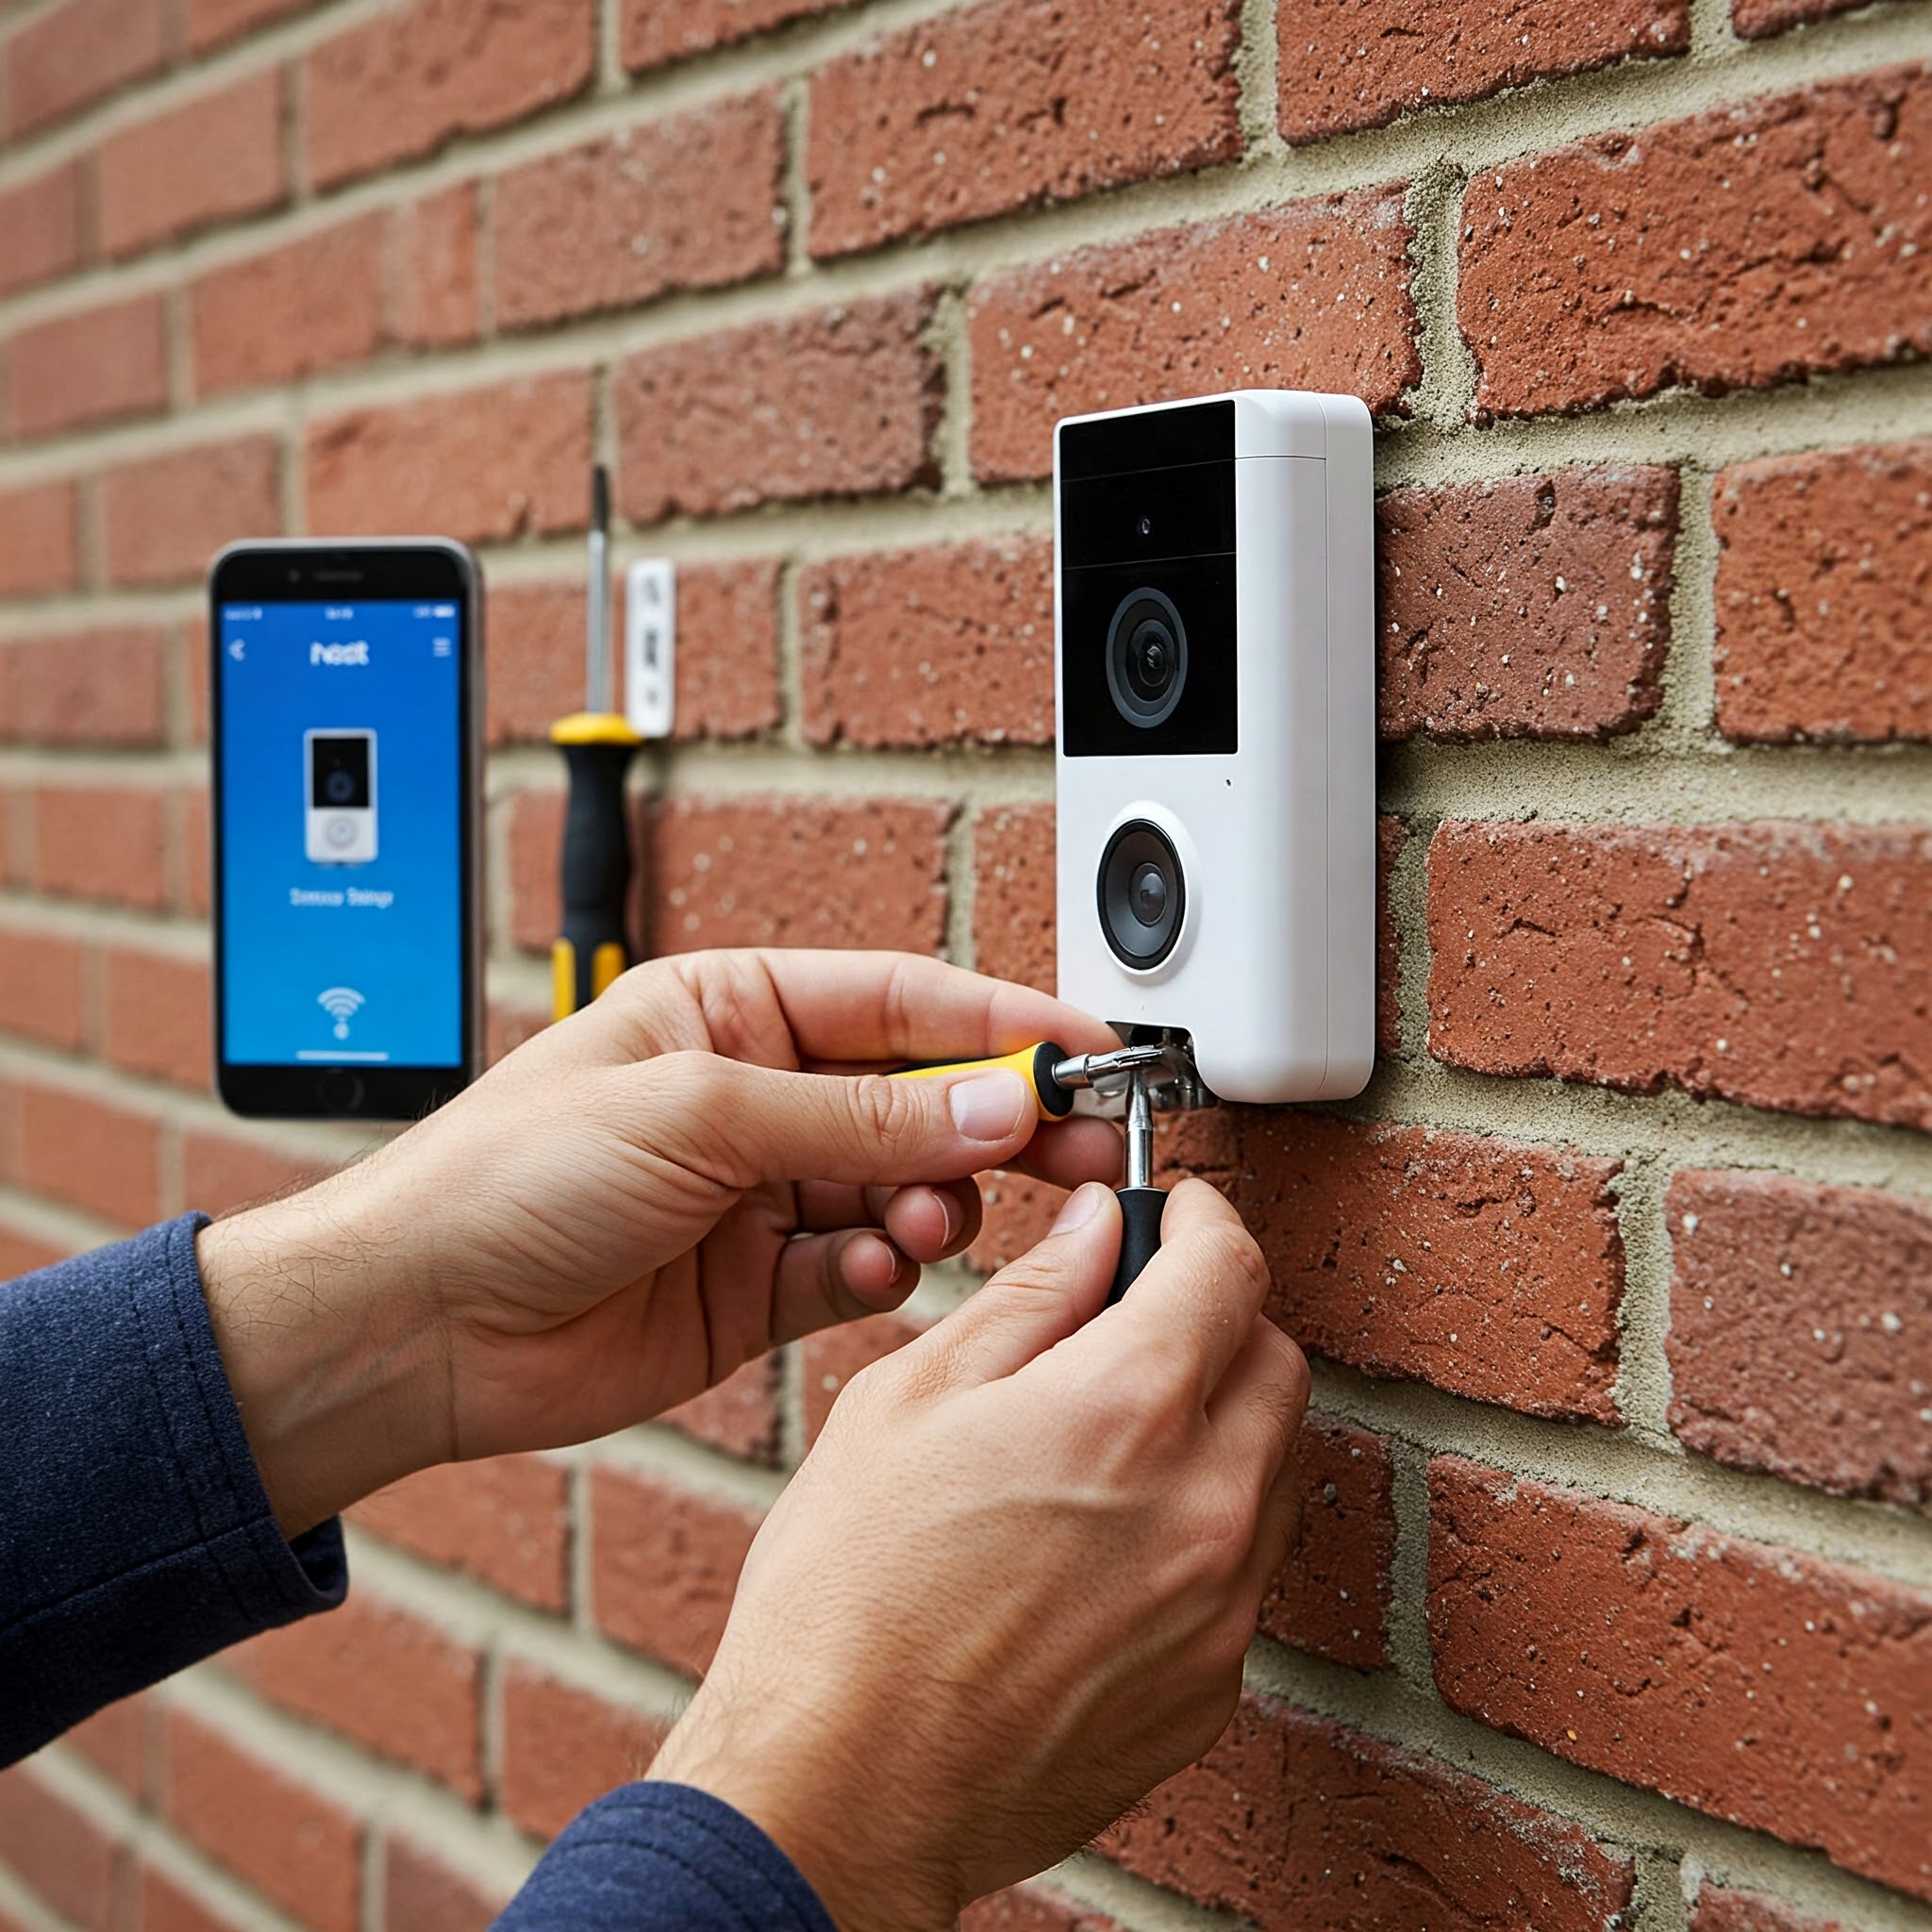 Installing a smart doorbell is simple, even for beginners with no tech skills.
Step 5: Attach the Doorbell Unit
Snap the doorbell onto the mounted bracket. Tighten any security screws (included) to lock it in place, deterring theft. For battery models, ensure the battery is inserted.
- Why It Matters: A secure fit protects your investment.
- Pro Tip: Apply weatherproof tape (included) around edges for rain protection.
Step 6: Set Up the App
Download the Ring app or Google Home app from the App Store or Google Play. Create an account, select “Add Device,” and scan the doorbell’s QR code (on the device or manual). Follow prompts to connect to Wi-Fi and test the live video feed.
- Why It Matters: The app delivers alerts and video, making your doorbell smart.
- Real-World Win: Tom, a homeowner, caught a package thief on his Ring’s video, saving $200 in goods.
Step 7: Configure Motion and Alerts
In the app, enable motion detection and set zones (e.g., porch only) to avoid false alerts from passing cars. Test by walking past the doorbell—your phone should ping with a notification and video.
- Why It Matters: Customized alerts reduce noise and catch real events.
- Pro Tip: Adjust sensitivity to low in busy areas to minimize notifications.
Step 8: Test the Full System
Press the doorbell button to confirm you receive a notification, live video, and two-way audio. Speak through the app to ensure visitors hear you. Test night vision by checking the feed after dark.
- Why It Matters: Testing ensures all features work for 24/7 security.
- Pro Tip: Save video clips (with a Ring Home or Nest Aware subscription, ~$6/month) for evidence.
Troubleshooting
- No Power: Double-check wire connections or charge the battery fully.
- Weak Wi-Fi: Use a Wi-Fi extender ($30) for better signal.
- No Alerts: Ensure notifications are enabled in the app and phone settings.
- Blurry Video: Clean the camera lens or adjust Wi-Fi bandwidth.
Pro Tips for Smart Doorbell Success
- Enhance Security: Add a “Video Doorbell” sign to deter thieves.
- Integrate: Connect to Alexa or Google Home to view feeds on smart displays.
- Save Battery: Lower motion sensitivity to extend battery life (up to 6 months).
- Share Access: Grant app access to family for shared monitoring.
Your smart doorbell is now your home’s watchful protector, delivering peace of mind and catching every visitor—or intruder—on camera. From packages to late-night guests, you’re in control. Ready to make your front door smarter in 2025? Ring the bell and start securing!
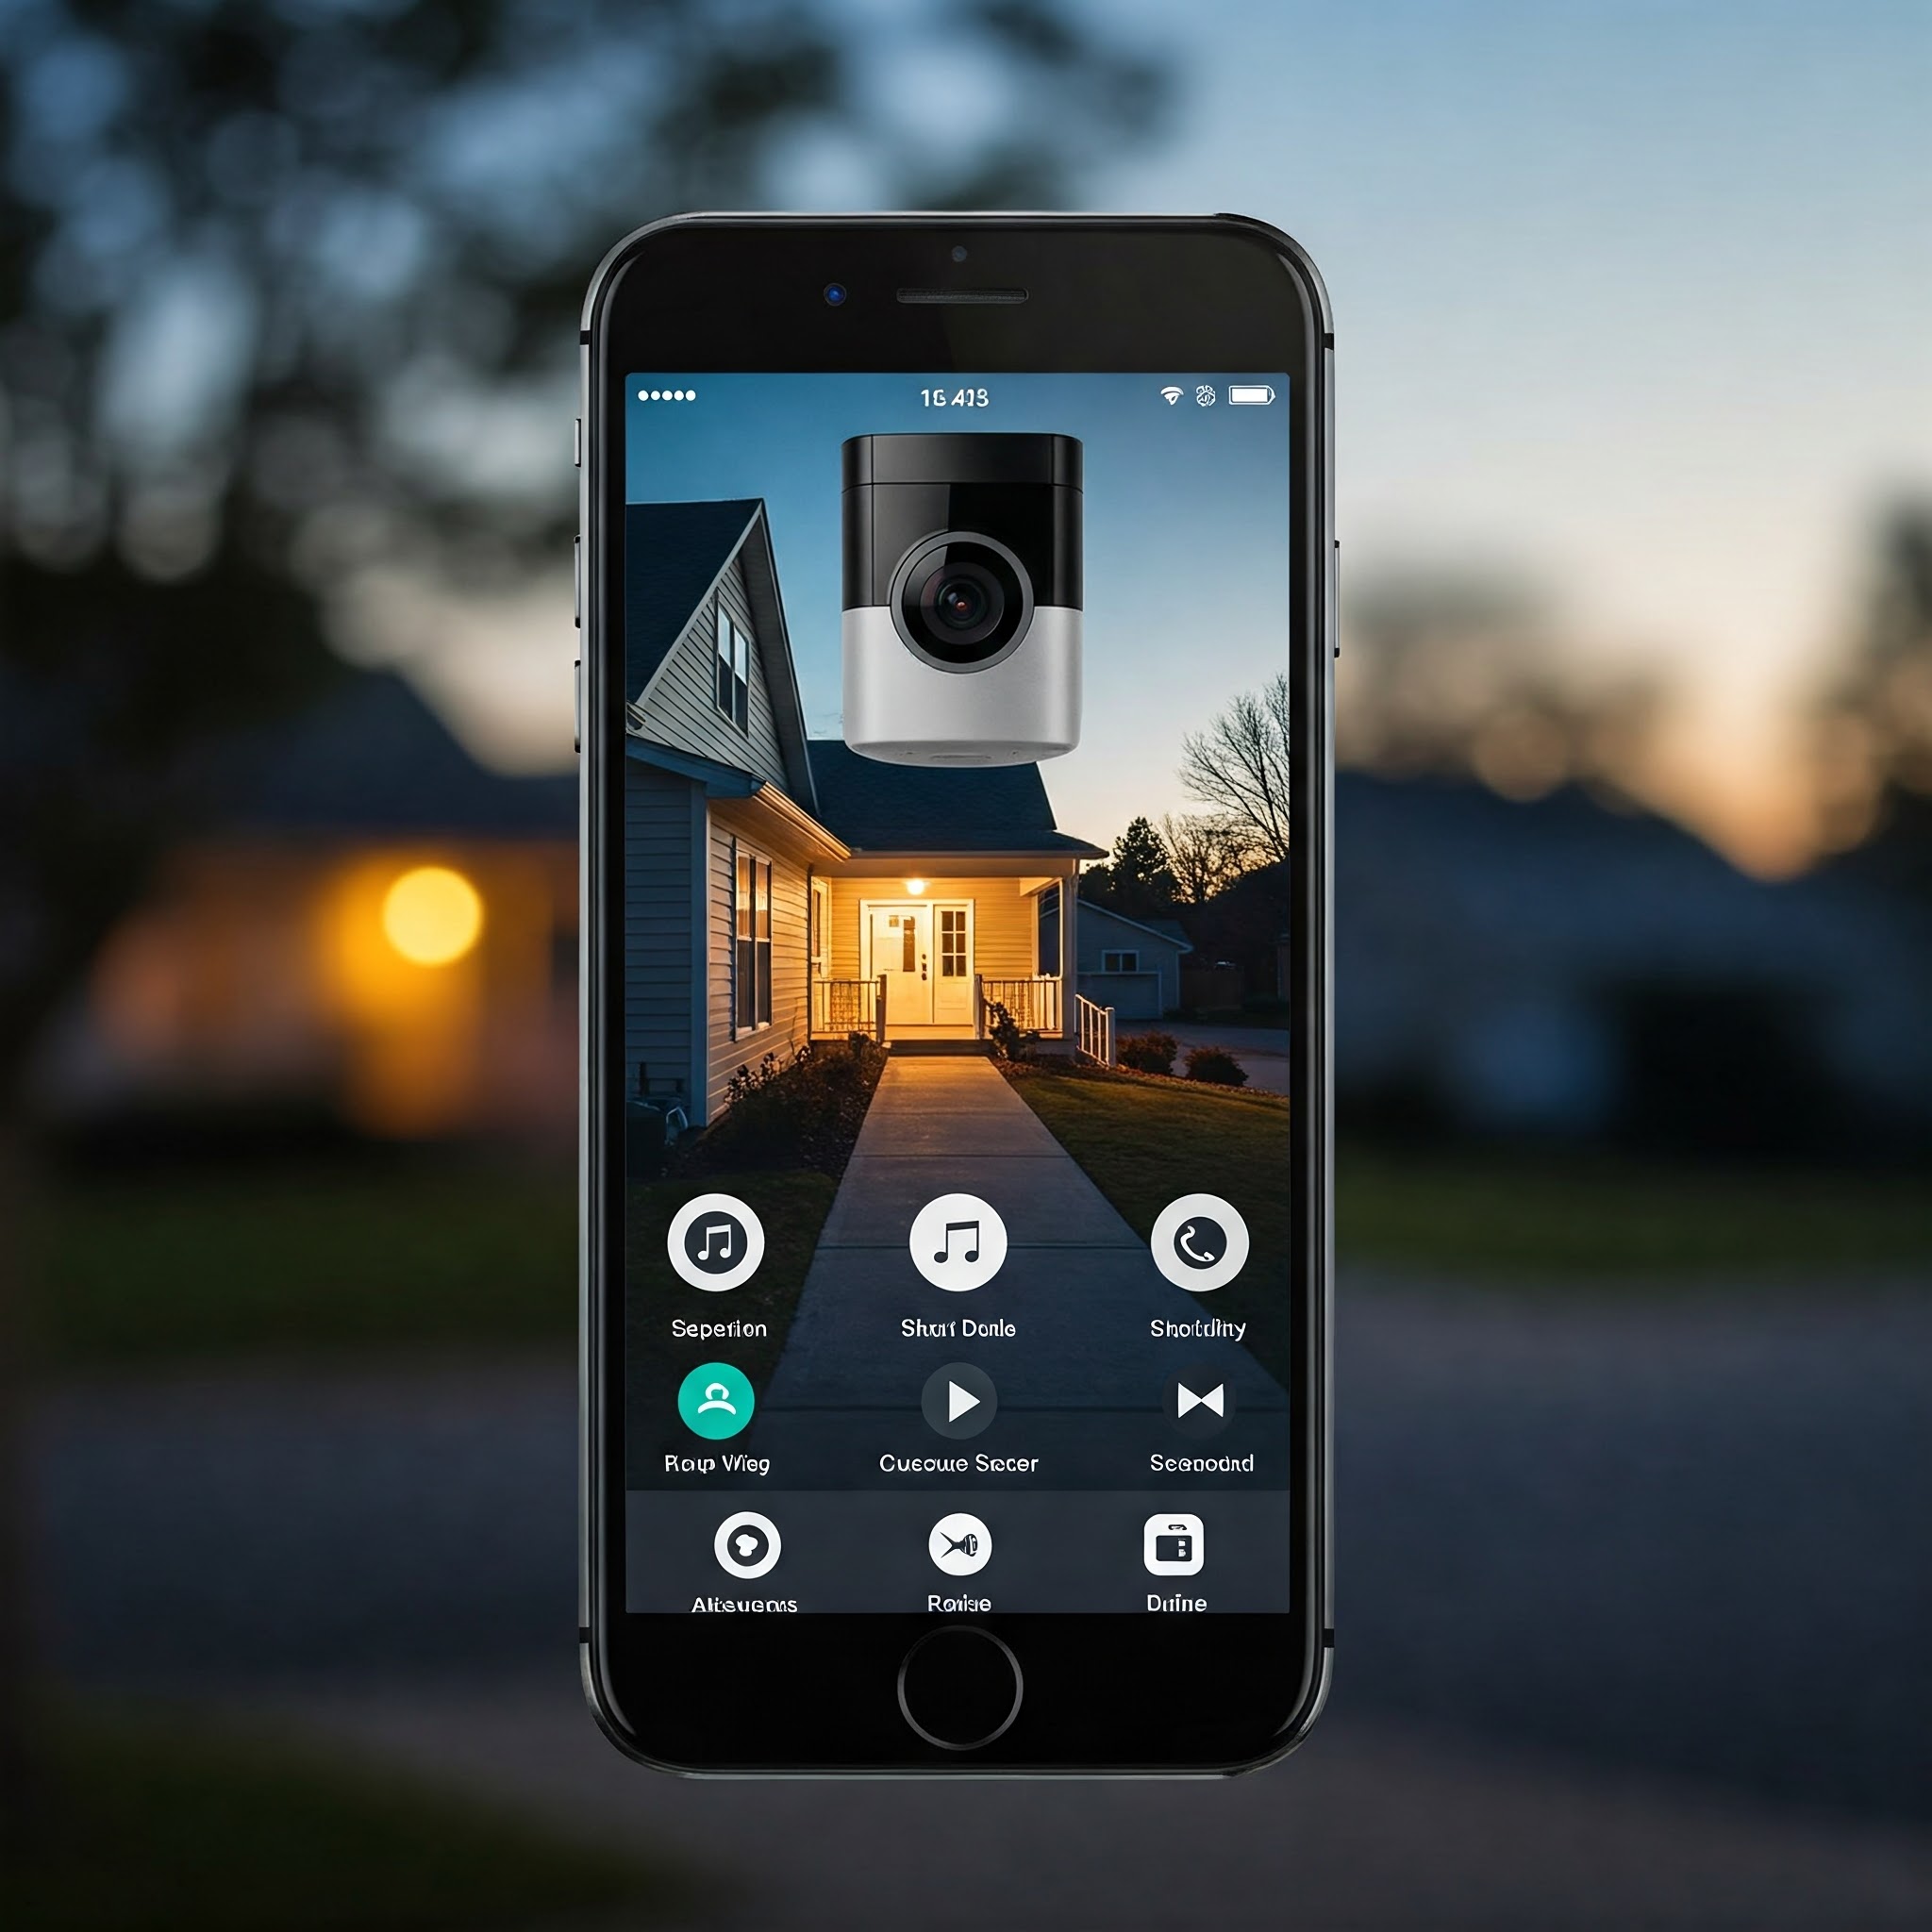 Instant alerts and live video keep you connected to your front door, anytime, anywhere.